August 1st, 2019
How to quickly setup print ready files in Adobe Illustrator
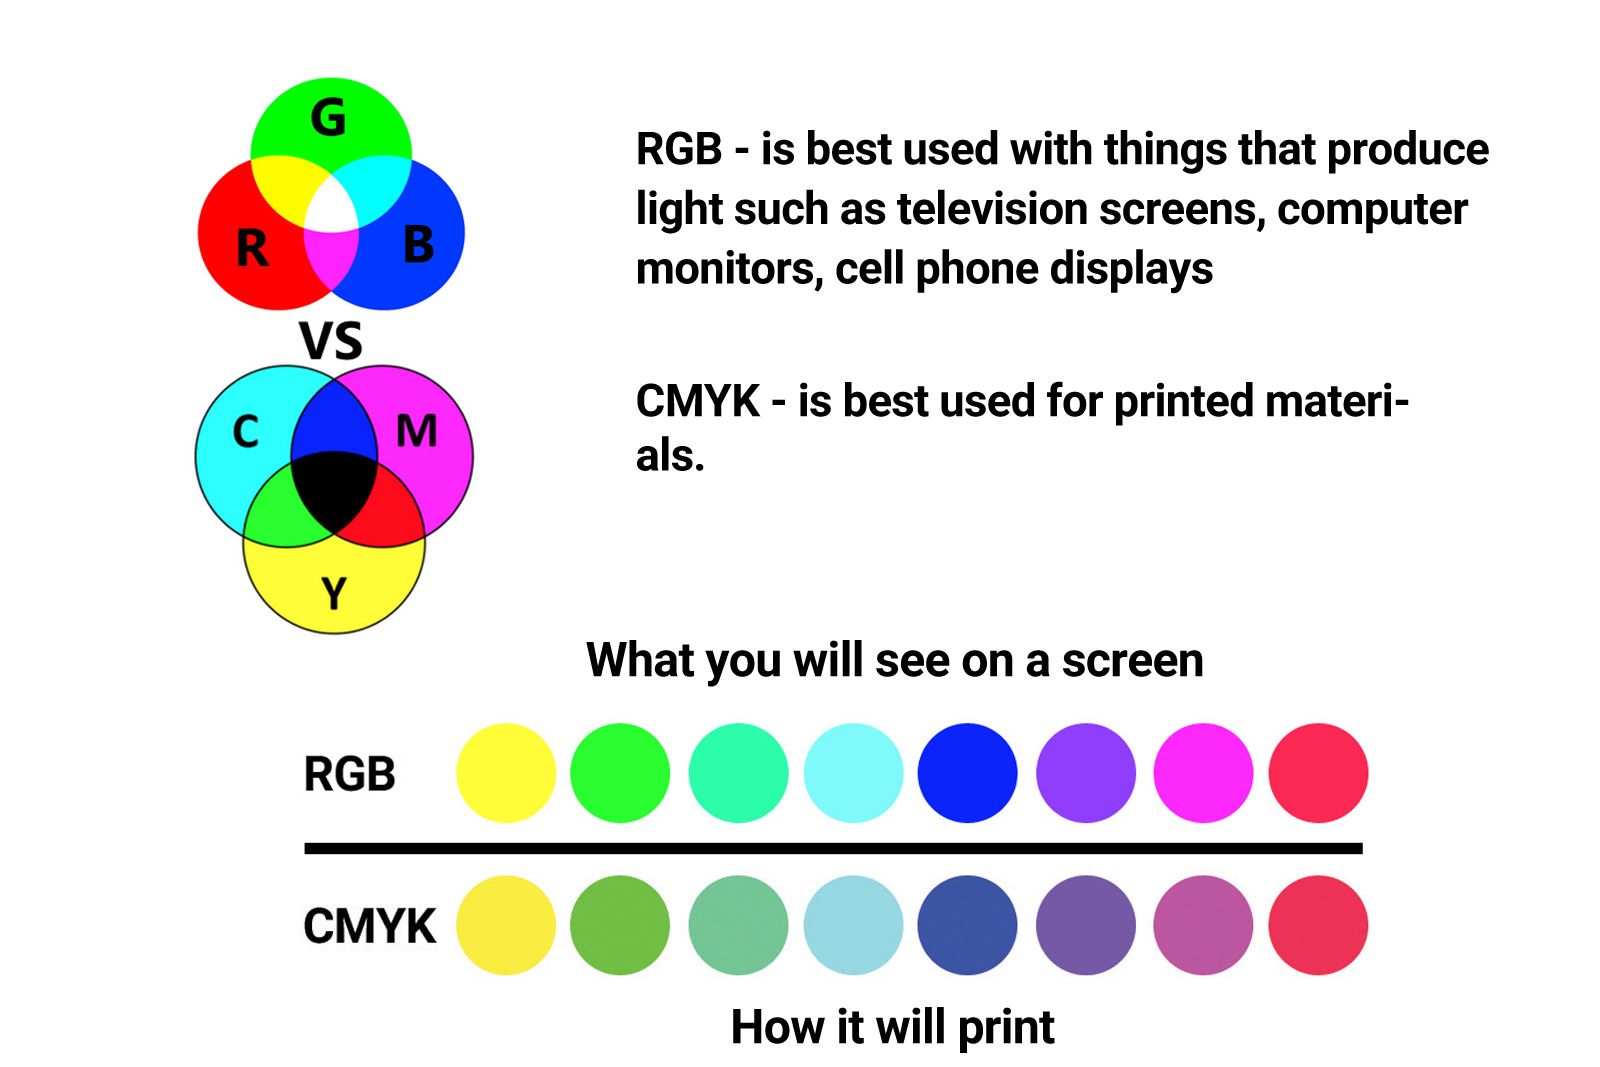
It is always advised that when designing a file that it to be printed, you start your project out in CMYK. 99% of our products, require that the artwork be submitted in CMYK 300dpi. If you design first in RGB then convert to CMYK – the color change can sometimes be quite obvious for example if your design has bright or neon greens or contains a lot of red. So as a rule of thumb, best to start with CMYK to avoid color shift issues.
Here is a quick step process to setting up your print ready file in Adobe Illustrator:
- Open Illustrator
- Click File, then New
- Set your print dimensions (green arrow) – this will most likely need to include bleed (see step 4)
- Make sure to include the appropriate bleed for your print product (red arrow) – if you are not sure of the bleed required for your specific print item, ASK. Not all printed products have the same bleeds.
- The following must be set to ensure print ready status – color mode to CMYK and Raster Effects (or resolution) to 300dpi or ppi
- Then click OK – you are now ready to start designing.
After your design is complete, make sure to save in a high-resolution jpg or pdf. If you are saving in a pdf make sure to embed all images and outline the fonts.